

Not so long ago, making fire was somewhat more complicated than it is today. If you have made fire using friction methods, then you know that it takes practice and experimentation to get it down or to start a fires in less-than-ideal conditions, but you also know a rush is to make fire using primitive methods and felt the boost in confidence that comes with it. If you learn fire by friction with a bow drill kit made from dimensional lumber that you purchased online, you probably gained a false sense of self-confidence, but when you make it yourself from materials you forage on your own, and start fires under more adverse, real-world conditions, it definitely improves your chances of survival.

We must learn to crawl before we walk or run. Many attempts fail before the student begins the exertion of creating fire because too little tinder, kindling and fuel are collected, the material collected is not properly prepared beforehand or the moisture content of the material is too high.
Crawl: before attempting fire by friction, practice building “one match” fire lays. As the name suggests, these are fire lays that are prepared well enough so that they can be lit with a single match.
Walk: once you have the one match fire lay down, then try the fire striker or “flint and steel” method.
Run: once you have the fire striker method down, dry the bow drill.
Most people stop once they learn to make fire with the bow drill, but a few on to try the hand drill, the fire plough, the fire thong and the fire saw and other methods. People who can reliably make fire with methods such as the hand drill and fire plough are an elite fraternity.
Once you have the fire striker method down, I suggest trying the bow drill. One the bow drill apparatus is built, starting a fire with the bow drill is easier than with a hand drill or fire plough. The bow drill set can be used repeatedly until it wears out, and worn parts can be replaced as needed.
To build a bow drill set, you must first locate and prepare suitable materials for the bow, spindle, bearing block, bow string, baseboard or hearth board, tinder bundle, extra tinder, kindling and firewood.
- Collect Materials – One could write an entire chapter just on bow drill materials and which species are suitable for bow drills or hand drill spindles or hearth boars. The main things that you need to know are that the wood can’t be too hard or it will glaze and never develop an ember, and that all materials should be bone dry. The materials for the hearth board, spindle, and bow can come from the same dead branch as long as the wood isn’t too hard and it is sufficiently dry.
- Hearth Board – For the hearth board, you will need to split a softwood board ½” thick and 3-4” wide. Good species for the hearth board include: balsam fir, basswood, cottonwood, cypress, elm, linden, poplar, red cedar, sycamore, white cedar or willow. (Angier, 1956)
- Spindle – For the spindle, you will need a straight stick about ¾” thick and 12-15” long. Suitable species include branches from the same species used for the hearth board or any of the following: elderberry, mullein stalk, sotol stalk or yucca stalk. Stalks from the latter desert plants are often used on cottonwood hearth boards.
- Bow – The bow is a curved piece of wood about 2’-3’ long and a little over an inch in diameter. The string can be a leather thong or modern cordage. A stronger string is better because it enables more force to be applied without breaking.
- Bearing Block – The bearing block is used to control pressure on the spindle and hold it in place as it spins. It should provide a low-friction surface so that the spindle can spin freely. Some knives feature a rounded depression in one of the handle scales to serve as a bearing block. Inuit bearing blocks were made of wood, bone, antler or soapstone set in wood. The pit only needs to be about ¼” deep.
- Tinder – The tinder bundle consists of two parts, the bird’s nest and the outer bundle. The bird’s nest is about the size of a lemon and is comprised of the best tinder you can find. The outer tinder bundle is usually comprised of shredded bark and dry grass or similar materials that will light easily and is about the size of a head of lettuce.
I recommend gathering three times what you think you will need: about three lemons of bird’s nest and three heads of lettuce worth of tinder, because you may not be successful on your first attempt and you may need to feed the fire if conditions are poor.
For the bird’s nest, you can use actual bird’s nests, char, various species of prepared tinder fungus, birch bark, elderberry pith, milkweed down, fireweed down or similar bark or plant down or finely shredded jute cordage, if available.
Large pieces of dry bark are also useful as a dry work surface when attempting to start a fire on wet ground or snow. If your tinder has any moisture in it at all, put inside a plastic bag (if available) and tuck it inside your clothing next to your torso. Over half an hour to an hour, your body heat will help drive moisture from the tinder.
- Prepare the Tinder Bundle – The tinder must be prepared by shredding it to increase the surface area. Once you get a fire going, char whatever tinder you have to improve it in case you have to make fire again.
For the tinder bundle, you can wrap dried grass in shredded tree bark. The inner bark of dead aspen or birch, cottonwood, juniper, eastern or western red cedar bark or tree bark with similar properties or dried grass will do.
- Make the Baseboard – The baseboard can be pinned motionless with a foot or knee, by wedging it in a channel carved into a log or wedging it with stone or wood.

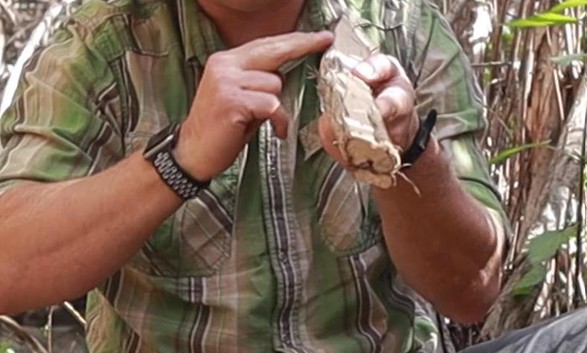
- Carve the Divot in the Hearth Board – The divot should be about ¾” diameter. And the edge of the divot should be about ¾” from the edge of the hearth board because you will cut the notch there where the ember or coal will form.
- Carve the Spindle – The top of the spindle is rounded where it engages the bearing block and is greased prior to use to reduce friction. The bottom end of the spindle is sharpened, like a pencil, where it engages the divot in the hearth board. The top of the spindle is greased to reduce friction. Larry Dean Olsen suggested rubbing it on the sides of the nose or through greasy hair.(Olsen, 1976) Olsen also pointed out that using water will only make the wood swell and bind. Soap can be used as a lubricant though, if available. Ray Mears suggested making the rounded top of the spindle and the socket in the bearing block smaller to reduce the friction area and keeping the sharper bottom end the full diameter to increase friction with the hearth board. (Mears, 2002) The US Air Force Survival Manual Regulation 64-4 Search & Rescue Survival Training recommends carving the spindle to make it octagonal, where the string contacts, so the string won’t slip. (United States Dept. of the Air Force, 2002)

- Carve the Bearing Block Socket – The socket in the bearing block should be rounded, should match the size and curvature of the top of the spindle, and should be about ¼” deep. Apply grease or soap to the bearing block socket for lubrication.(Tawrell, 1996)
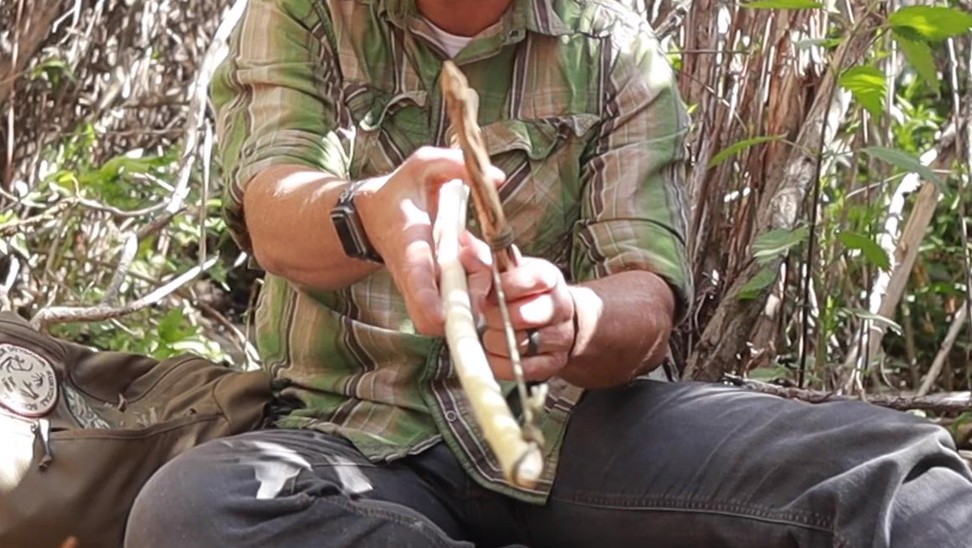
- String the Bow – For the primitive bow string, a leather thong was used when available. Leather was stretched tight because it is somewhat elastic. If you string the bow with a bootlace or modern cordage without much stretch, it will not need to be as tight. A trick I learned from David Holladay was that if you don’t have any cordage, you can tear the bottom seam from a t-shirt and braid cordage from that. You can also braid a string from plant fibers, rawhide, catgut or sinew. Tie the string loosely to the bow and then twist the spindle into place. It may take a couple of tries to get the tension right.
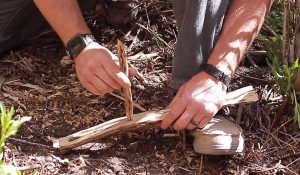
- Assemble the Drill – Place the baseboard on the ground. Kneel down, step on the baseboard with your weak-side foot to hold it fast. Twist the spindle into the drill with the pointy end in the divot in the hearth board and the rounded end in the socket in the bearing block. Reach your weak-side hand around your shin, and grasp the bearing block, keeping your wrist locked snugly to your shin so the assembled bow drill doesn’t wobble while you saw.
- Burn a Divot in the Hearth Board – Use the assembled bow drill, spindle and bearing block to “burn in” the divot. Slowly work the bow in a back-and-forth sawing motion. Gradually increase speed and pressure, bearing down on the bearing block. This will blacken the divot where the spindle makes contact, making it easier to see where to cut the notch.
- Cut the Notch in the Divot – The notch is where carbonized dust collects, forming the coal. The notch should extend about 1/3 of the way into the divot. It should not extend to the center. Another thing I learned from David Holladay was that relieving the underside of the notch enables the coal to drop freely on the tinder bundle without sticking to the notch.
- Burn the Ember – Place a flat leaf, piece of bark or wood under the notch to catch the char dust and transfer it to the tinder bundle. Carbonized dust will build up into a “ember.” Work the bow slowly in a back-and-forth sawing motion, gradually increasing the speed and pressure by bearing down on the bearing block. Once the ember smokes steadily.
- Transfer the Coal to the Tinder Bundle – Very carefully pick up the bark chip or leaf and transfer the delicate coal to the bird’s nest in the center of the tinder bundle. If you drop it, you’ll have to start over, so tap gently if it sticks.
- Blow the Coal into Flame – Supply the coal with oxygen by blowing, gently at first, and then harder until the coal begins to consume the tinder bundle. Add tinder and oxygen as needed and flame is achieved. If necessary, feed it by adding a sprinkling of fine ground tinder as you blow. Carefully bend the tinder bundle with your hands to get it over the ember.
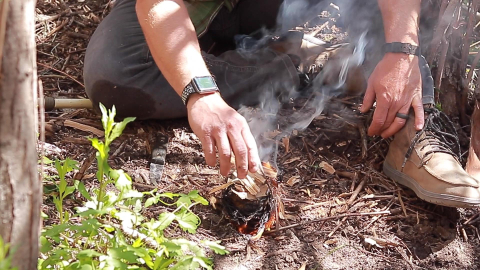
- Light the Fire Lay – Place the lit tinder bundle inside the fire lay, taking care not to burn yourself or knock the fire lay over. You may need to add a little tinder or kindling or fan the fire with your hat to get the fire lay to catch, but if you take the time to build the fire lay right, all you will have to do now is tend the fire.

Fire has long been one of man’s most powerful tools. With it, we warm ourselves, cook food, make tools and light our camp to work past sundown. The gifts of intelligence, opposable thumbs, fire and cutting tools gave man dominion over animals. Without fire, we are inferior to animals.
I don’t’ think it is possible to truly understand man or oneself, without first learning to make fire the way our ancestors did.


References
Angier, B. (1956). How to Stay Alive in the Woods. New York: Black Dog & Leventhal Publishers, Inc.
Mears, R. (2002). Essential Bushcraft. London: Hodder & Stoughton.
Olsen, L. D. (1976). Outdoor Survival Skills. Provo, Utah: Brigham Young University Press.
Tawrell, P. (1996). Camping & Wilderness Survival. Sherburn, Vermont; Green Valley, Ontario: Paul Tawrell.
United States Dept. of the Air Force. (2002). Regulation 64-4 Search & Rescue Survival Training. New York: Michael Friedman Publishing Group Inc.
Read the full article here


")
