Upgrades For Your 1911
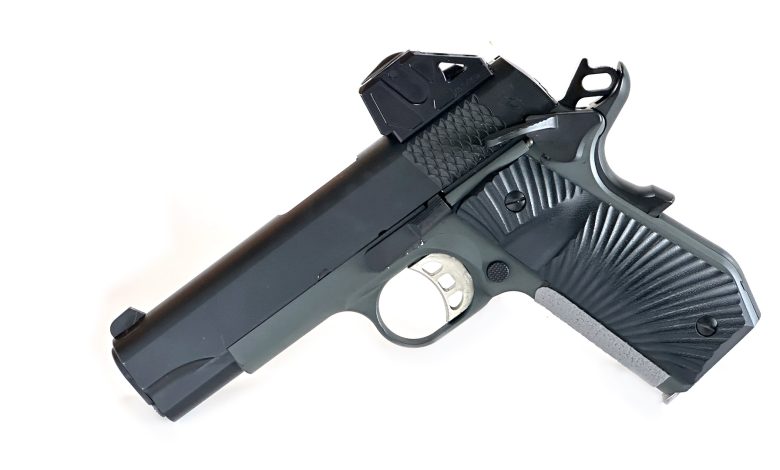
I recently decided to dedicate myself to a new gun for at least one year, just like Sheriff Jim recently did. However, unlike his Model 19 Smith and Wesson revolver, I chose to go with a 1911, albeit one in 9mm and not the traditional .45 ACP.
Upgrades With A Purpose
Since starting this journey, I came to two conclusions. The first was, my eyes were just not up to using iron sights on a full time basis, and I needed some practice and training to become more accustomed to a new daily carry gun. I took care of that latter problem by signing up for a nearby Gunsite 150 class. Now it was time to take care of the first problem, and upgrade my 1911.
I needed to choose a dot to use in the class, and then have the slide for my Tisas Stingray cut and milled for that red dot. Also, because Gunsite requires OWB (Outside The Waistband) holsters for their introductory classes, I needed a new holster. Finally, I was planning on carrying this gun before and after class, so I needed some reliable and effective defensive ammunition.
Time to get to work.
Sight It In
The skinny slide of a 1911 obligates the use of smaller, RMS footprint red dot sights, and so I went to Shield Sights, the originators of the RMS footprint, for one of the new AMSc sights. The AMSc uses the same footprint, but it is an enclosed emitter sight, which makes it well-suited for harsher climes, where rain on an emitter can turn a red dot into a red smear. The brightness of the dot automatically adjusts for the available light, and the battery inside can be replaced without re-zeroing the sight. Speaking of zeros, one of the nicest features of the AMSc is that it co-witnesses with standard height sights, so there is no need to swap out the stock sights on the pistol for taller, suppressor height sights.
There are many, many gunsmiths out there who could mill the slide of my 1911 and affix the red dot, but I went with Dave Fink of Finks Guns. Dave is the gunsmith in residence at Gunsite, and his work is renowned around the world. In addition to cutting the slide and mounting the dot, Fink did a workover on the Stingray, optimizing it for accuracy and reliability.
Get A Grip And Keep It There
The stock grips on Tisas Stingray are fine, but I like a little more texture on the frame to give me a better grip when my hands get sweaty. A few minutes spent online at Talon Grips’ website resulted in an attractive and practical upgrade to this 1911.
Because this gun was getting a top-of-line overhaul from one of the best gunsmiths in the country, I decided that a normal holster just wasn’t going to cut it, and chose a Galco Avenger holster for use before, during and after the class. Aside from looking absolutely terrific on my waist, it fit the Stingray like a proverbial glove and released it right out of the holster on the draw.
I wanted to use the same holster for training on the range as I would for carrying concealed, so that meant working around the shape of my lower half. The curves on my body are sadly limited to what some might call a beer belly. As a result, a defensive pistol inside an OWB holster tends to fall away from my body, as there is not enough hip there to press the gun into my side and hide it from prying eyes.
Enter something called “Concealment Mechanics,” which helps people understand how their holster does (or does not) conceal their firearm. In my case, I needed to press the top half of my gun, the part above my belt, into my body so it could be concealed. This was accomplished by adding a soft wedge, like what is commonly used for AIWB carry, to the bottom of the holster. This pressed the gun up into my body without affecting my draw stroke and allowed me to carry concealed under a t-shirt. This was a nice change, as my success with concealed carry and OWB holsters was iffy in the past.
Feed The Beast
Any 1911 aficionado will tell you that the key to a reliable 1911 is good magazines, which is why I went with a combination of 9 round and 10 round magazines from Wilson Combat. High-quality 1911 magazines is how Bill Wilson built his business, and that company continues to lead the pack to this day.
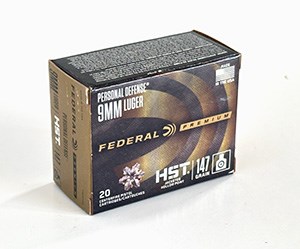 For ammunition, I went with Federal Premium 147 grain HST rounds for defensive purposes, and 124 grain Syntech for practice and training. The HST bullet is a proven performer, and I have full confidence it can do the job when necessary. Federal’s Syntech ammo, on the other hand, was new to me, and I was pleasantly surprised with it. It ran great in my 1911, which is something of note, as 9mm 1911s are notoriously picky about ammo. Moreover, rather than tearing through the target and leaving a ragged hole, it made precise, easy to spot round holes in the paper. This could come in really handy in competition, where matches are often won and lost by the slimmest of margins.
Are The Upgrades Worth It?
It’s been a few weeks since the Gunsite class, and during that time, I’ve been practicing with my 1911 and getting used to what it can do. For a while now, t’s been my goal to make Master in IDPA, which means I’ve been practicing the skills needed in that competition. One of the skills is drawing a pistol and putting five rounds into a 6 inch circle 10 yards away as fast as possible. The heavier weight and better trigger of the Tisas 1911 translates into shaving more than half a second off the time I need to accomplish this task, so yes, I’d say these upgrades have been worth it.
Read the full article here


